
Using these GPS courses with Garmin Edge devices
There’s “easy”, which works fine for short rides, and should be okay on long rides. And there’s “a little more work”, which will pay dividends on long and multi-day rides. All require an initial setup step, once.
Every set of GPS files for each event includes a “Link for pinning” — this links to the main RideWithGPS route that I maintain, which is exactly where all the other versions are taken from:

The first two options below require this link — it’s always on the page at least twice. FWIW, I am completely tech-literate, so I use the third option, occasionally reverting to the second when I forget before leaving the house. But in either case I switch off all the beeps and ride by the routesheet, which is far more civilised.
Easy — push to Garmin Connect
First, link your RWGPS account with Garmin Connect — you only need to do this once.
Then, to copy a complete route onto your device, “pin” (“save to pinned”) the main RWGPS route and it should be copied to Garmin Connect, which should then automatically copy it to your device via your mobile:
Pros:
- Easy (once the first step is done once)
- Only a single route to worry about
Cons:
- Needs a laptop
- Needs a RWGPS account
- Needs a mobile phone set up with Garmin Connect
Easy - pull from RideWithGPS
First, install the RideWithGPS Connect IQ app onto your Garmin device (scroll down to find it) — you only need to do this once.
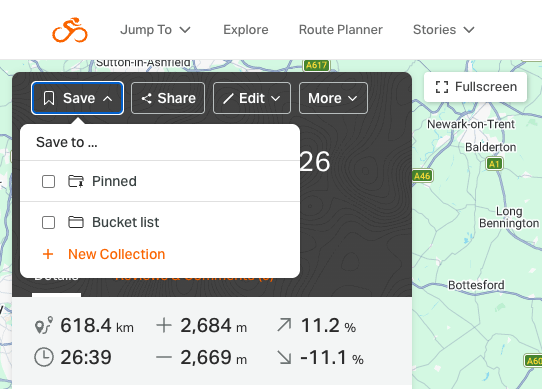
Then, to copy a complete route to your device, “pin” the route in RWGPS (see image above) and use the Connect IQ app to fetch it directly to your device from the device itself.
Pros:
- Easy (once the first step is done once)
- Only a single route to worry about
Cons:
- Needs a RWGPS account
- Needs a mobile phone set up with Garmin Connect
Better for long rides — broken up into shorter parts
For the slightly more tech-literate, you get the choice of using halves/legs/stages versions of the route, depending on your preference. Me: for long rides, particularly 400+, I like two or three routes, because this both splits up the navigation nicely, and also mitigates certain Garmin bugs.
The process is trivially easy (I think), once you’ve done it once:
- Connect your Garmin to your laptop over USB
- Inside the new Garmin drive there’s a directory/folder called
Garmin— and inside this, create a new folder/directory calledNewFileswith exactly that name, if it doesn’t already exist
Then, to copy a custom set of routes onto your device, download the set from the ride’s page on this website and unzip them onto your laptop/computer. Then simply drag-n-drop (or cut’n’paste) the TCX files into NewFiles, unmount/remove USB device properly and when your Garmin restarts, it will have all the short part-routes ready to use.
The numbering of all the parts is logical, clear, and you can have multiple sets (e.g. both north/south, and stages) loaded and the names should be consistent and reasonably obvious.
Pros:
- Easy (once the first step is done once), albeit technophobes may not agree with me on this
- You get exactly the route slice’n’dice you prefer — all of them at once if you like
- Doesn’t require a RideWithGPS account
- Doesn’t need a mobile phone
Cons:
- Needs a laptop
- Needs a USB cable
- Needs a working knowledge of Windows Explorer (or Mac Finder), unzipping of ZIP files, and drag-n-drop (or cut’n’paste)
- Needs to be done before leaving the house
Summary
If you’re not into long rides, using the pinning link should be fine in almost all cases. For long stuff, learn the third way, it’s the best way.
Whichever method you choose, practise it and it will become second nature.
And I’ll say it again: learn to love the routesheet! It’s far more interesting and far more civilised than beeping through the night, or concentrating on following a vague pink line while missing out on the views!